Introduction
The holidays are near and I want to have access to my files on my Synology NAS, while I’m visiting my family. That’s why I’m showing you today how to configure the official Synology VPN server to use OpenVPN with client certificates instead of username/password.
Start with a custom root CA
First of all you need your own self-signed root CA. A useful tool is XCA but you can also do this from the terminal.
Create a certificate for your DiskStation
Create a new Certificate for your DiskStation. Be aware to use the assigned DNS name, otherwise your browser will complain when you try to connect to the web interface of the DiskStation.
Configure the DiskStation to use the server certificate
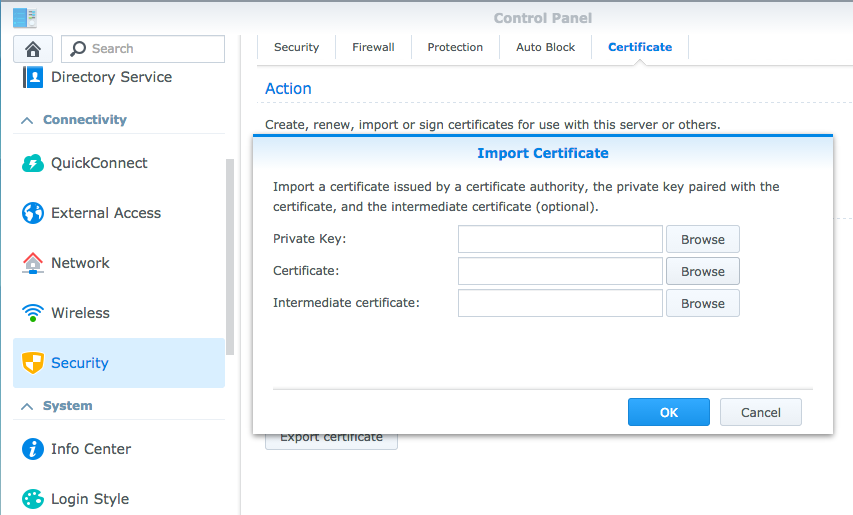
I’m using DSM 5. There’s a nice new Security setting in the system settings. You can define and upload a certificate there:

The Private Key and Certificate fields are straight forward. However, the intermediate certificate is the tricky part I forgot. This is the certificate of your self signed root CA. Only with this additional certifacte the trust chain is complete.
Trusting the root CA
The next step depends on your computers OS. I’m using Mac OS where I can easily add the root CA certificate as an always trusted certificate.
Reload the web interface of your DiskStation
After you’ve set the certificate, the web interface should have been reloaded. Eventually you’ve been warned by your browser about a security issue (you did not trusted your root CA, therefore the web page was untrusted). After a reload and the instructions from step 4, this warning should go away. If you take a look at the certificate tab of the DiskStation’s security setting, you will see that your new server certificate is active.
Install the VPN Server
Install the VPN Server from Synology’s Package Center. Its configuration is done from the start menu.
Configure the VPN Server
Enable OpenVPN from the Settings of the VPN Server. For more details see Synology’s instructions.
Connect via SSH to your DiskStation
Disable user authentication on the DiskStation and enable the certificate based authentication (code taken from this wiki) in this file: /usr/syno/etc/packages/VPNCenter/openvpn/openvpn.conf
#ca /var/packages/VPNCenter/target/etc/openvpn/keys/ca.crt
ca /volume1/myCA/demoCA/my-ca.crt
#cert /var/packages/VPNCenter/target/etc/openvpn/keys/server.crt
cert /volume1/myCA/syn.crt
#key /var/packages/VPNCenter/target/etc/openvpn/keys/server.key
key /volume1/myCA/syn.key

#you can enable this line temporary to view log with "tail -f -n 100 /var/log/openvpn.log":
#log-append /var/log/openvpn.log

#plugin /var/packages/VPNCenter/target/lib/radiusplugin.so /var/packages/VPNCenter/target/etc/openvpn/radiusplugin.cnf
#client-cert-not-required
#username-as-common-name

#added
user nobody
group nobody
#added
Configure your client
I’m only using iOS devices and Macs. Therefore this is again a little biased 🙂 The installation of the clients for Mac and Windows is explained on Synology’s page. iOS is explained on this page (only in german but with screenshots). The initial configuration can be downloaded from the OpenVPN settings page from the DiskStation web interface. The extracted zip file contains the servers official certificates but needs to be modified to add support for the client certificates. Text is taken again from same wiki as above.
#ca ca.crt

#added
dh dh1024.pem
ca my-ca.crt
cert my.crt
key my.key
verb 3
#added

#auth-user-pass
The DiffieHellmann Parameters (dh) can also be created with XCA. I would recommend 2048, since 4096 takes ages to generate.
Give it a try
Now you can test your VPN connection on your devices. It should not ask for a password, instead it should use the my.crt and my.key you’ve set in the configuration.